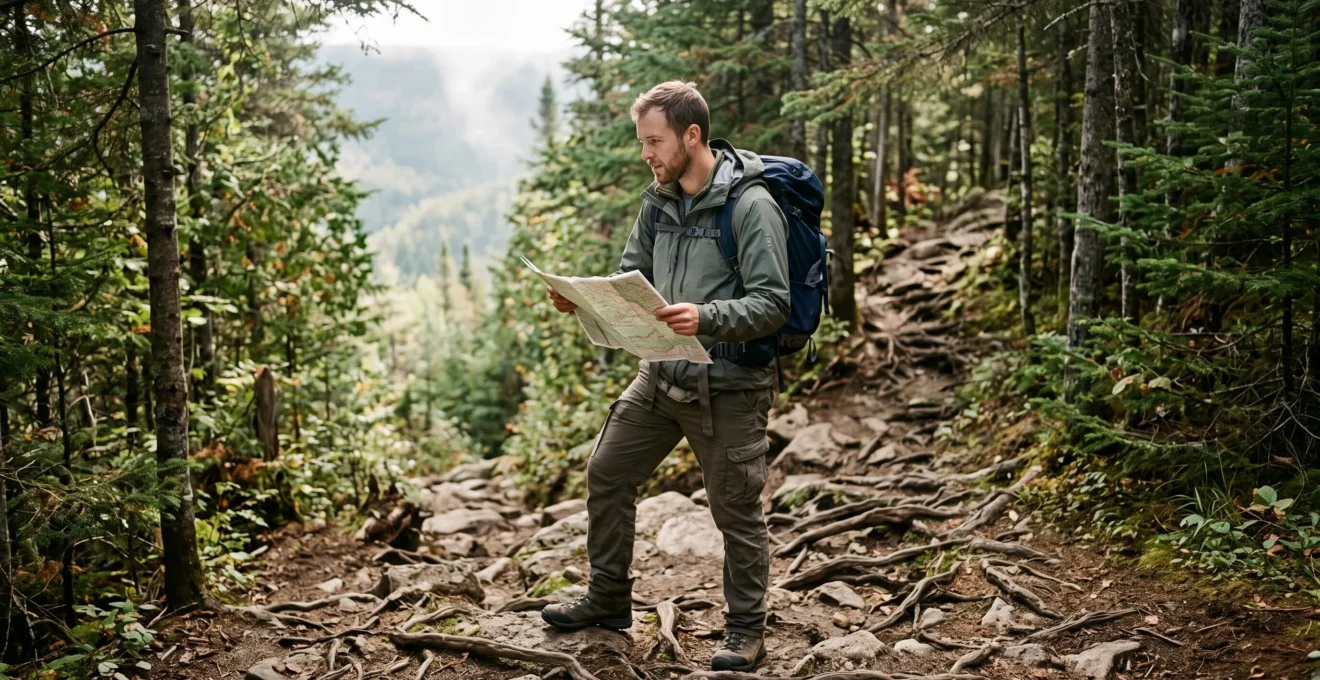
A short hike of just a few kilometers can quickly turn into a serious challenge when the trail scrambles over boulders, climbs steeply, or becomes slick after rain. In Canada, diverse landscapes, sudden weather shifts, and the remoteness of many routes demand preparation that goes far beyond simply checking trail distance on a map.
Planning an outing tailored to your skill level requires evaluating three elements together: actual physical exertion, terrain difficulty, and real-time conditions on the day of the hike. Route selection must also consider the fitness and experience of your group, available daylight, gear, and realistic turnaround options.
Beginner hikers benefit from starting on short, low-grade, well-marked trails. Intermediate hikers can progressively increase difficulty, provided they maintain a comfortable safety margin. This measured approach lets you explore Canada’s wilderness without turning an enjoyable day out into an emergency situation.
Three key habits for planning a safe hike
- Assess the route: Compare distance, elevation gain, technical obstacles, and exposure rather than relying solely on trail ratings.
- Ensure self-sufficiency: Pack sufficient water, appropriate layers, backup navigation, and buffer time, even for a short day hike.
- Be ready to adapt: Modify your route or turn back when weather, trail conditions, or fatigue narrow your safety margins.
- Why Can a Short Hike Be More Demanding Than a Long, Easy Trail?
- How to Pack a Daypack Without Adding Unnecessary Weight
- Easy or Intermediate: Which Trail to Choose for Your First Hilly Hike
- What Mistakes Make a Hike Dangerous Once Cellular Coverage Disappears?
- When Should You Turn Back Despite Having a Planned Route?
- Adapting Your Approach: How to Progress Without Losing the Joy of Hiking
- Why Does a Cascade of Small Stresses Lead to Mental Fatigue on the Trail?
- How to Replace Car Trips with Practical Active Transportation
Why Can a Short Hike Be More Demanding Than a Long, Easy Trail?
A short hike can be far more demanding than a longer route when elevation gain is packed into a few steep kilometers, the footing requires technical maneuvering, or opportunities to recover are rare. Distance alone does not measure physical exertion or overall risk.
On a graded, groomed trail, walking engages muscles predictably. On a steep, rugged path, every step demands adjustment: stepping over exposed roots, keeping balance on slick granite, or controlling momentum down a steep descent. These continuous adjustments fatigue leg muscles faster and require sustained mental focus.
To accurately gauge trail difficulty, three variables must be evaluated together:
- Total elevation gain: A steep ascent over a short distance demands much more cardiovascular effort than a gradual climb spread across several kilometers.
- Underfoot terrain: Loose scree, slippery roots, mud pits, and eroded sections significantly slow walking pace.
- Trail exposure: Steep drop-offs, narrow ledges, or unprotected rock faces amplify the consequences of a simple slip or fall.
Consider two hypothetical 5-km routes. The first follows a wide, gently graded gravel park trail. The second features steep rock scrambles, boulder fields, and a slick, muddy descent. While the distance is identical, the second demands far greater technical balance, joint stability, and time.
This contrast is evident across sections of Ontario’s Niagara Escarpment, as well as rugged river valleys and peaks in Quebec and British Columbia. Steep pitches combined with uneven footing can make a short loop surprisingly demanding.
6 km — at least 6 hours
At Bruce Peninsula National Park in Ontario, Parks Canada classifies the 6-km round-trip route from Halfway Log Dump as a rugged, demanding hike requiring at least six hours for a fit, well-equipped hiker. This is not representative of standard walking paces on groomed trails.
Parks Canada, Bruce Peninsula National Park visitor safety guidelines.
A frequent mistake is carrying less water, skimping on warm layers, or planning an overly tight schedule simply because a trail looks short on paper. However, navigating a technical scramble or picking your way down a steep slope can easily delay your return past sunset.
Always cross-reference advertised trail distances with topographic elevation profiles, trail manager advisories, and recent trail condition reports before heading out.
Understanding terrain demands also determines what goes into your pack: while traveling light is desirable, your gear must adequately address real-world backcountry hazards.
How to Pack a Daypack Without Adding Unnecessary Weight
To pack efficiently for a day hike, organize your gear into three tiers: essential safety equipment, conditions-specific items, and optional comfort accessories. The goal is not to carry as little as possible, but to eliminate non-essentials without compromising self-sufficiency.
The first tier includes hydration, calorie-dense food, protection against cold and rain, a compact first-aid kit, a dependable headlamp, and reliable navigation tools. These essentials are non-negotiable, even on short, familiar day routes.
The second tier depends on expected trail conditions. Traction cleats or microspikes are vital on icy spring trails, while head nets provide relief during peak blackfly and mosquito seasons. A portable water filter or purification tablets are crucial for remote routes, though hikers must remember that backcountry water sources can dry up seasonally.
Unnecessary weight comes from packing gear that addresses no plausible hazard or expected environmental condition. For every item packed, ask: “In what specific scenario will this item become essential?”
Pack planning must also reflect Canadian weather realities. Crisp morning temperatures can rapidly transition to midday heat, while snow and ice often linger at higher elevations well into early summer. Dressing in versatile technical layers provides far more adaptability than relying on a single heavy jacket.
For hydration planning, Parks Canada suggests a baseline guideline of approximately 0.5 liters of water per hour of moderate activity, adjusted for temperature, physical exertion, and personal hydration needs. Remote trails lacking potable water require carrying your full supply from the trailhead.
The Parks Canada hiking preparation guidelines emphasize layering systems, navigating with offline backups, and checking trail conditions prior to departure.
The decisive factor is not just total trail distance: it is how long you would need to remain safe and warm if your progress stalled or you had to wait out an emergency.
Five essential checks before zipping your pack
- Review the route: Save topographic maps, total mileage, key elevation changes, and bail-out routes in a trip plan.
- Check the forecast: Note expected temperatures, severe weather warnings, and recent trail surface updates from park managers.
- Verify your essentials: Confirm water volume, nutrition, thermal layers, rain shell, headlamp batteries, first aid, and navigation tools.
- Test your gear: Inspect headlamp charge, confirm offline maps are fully downloaded, and ensure traction cleats fit your boots.
- Leave a trip plan: Share your exact route, group details, vehicle information, expected return time, and emergency instructions with a trusted contact.
With gear squared away, selecting an appropriate trail rating becomes the next critical decision, especially when planning your first hike in hilly or mountainous terrain.
Easy or Intermediate: Which Trail to Choose for Your First Hilly Hike
For a first hike on hilly terrain, an easy trail is almost always the smarter choice, especially if your recent experience with steep ascents and descents is limited. An intermediate route becomes appropriate once physical stamina, footing confidence, group pacing, and stable weather ensure a comfortable safety margin.
Park trail ratings provide a useful baseline, but standards can vary between park systems. Seasonal storms, spring runoff, or erosion can quickly turn an otherwise accessible trail into a challenging route.
When selecting a route, compare objective, observable trail features:
| Feature | Choose an Easy Trail | Consider an Intermediate Trail |
|---|---|---|
| Elevation Profile | Gentle, gradual grades with frequent flat recovery stretches. | Sustained climbs that require established cardiovascular endurance. |
| Trail Surface | Even footing, well-maintained dirt, gravel, or boardwalks. | Exposed roots, loose rocks, and uneven steps requiring careful foot placement. |
| Navigation | Clear signage, well-trodden paths, and frequent trail blazes. | More subtle junctions requiring attentive map checks. |
| Turnaround Options | Short loops or easy shortcuts to exit early if fatigued. | Predetermined turnaround points that require significant walking to exit. |
| Environmental Conditions | Stable weather and dry trails ideal for building confidence. | Good weather with a group prepared for changing conditions. |
Use a simple three-point checklist: Has everyone in the group recently walked comparable hills? Does the group move at a compatible pace? Is the weather stable and trail surface dry? If the answer to any of these is no, starting on an easier trail is the prudent call.
Parks Canada generally categorizes trails as easy, moderate, or difficult. However, trail ratings do not guarantee an absence of mud, fallen trees, or slick rock, especially during shoulder seasons.
For beginner hikers, Parks Canada suggests planning on an average pace of 2 to 2.5 km/h on natural trails. This serves as a planning baseline, not a target pace, and will drop significantly on steep or rocky terrain.
Your total estimated trip time must factor in lunch breaks, viewpoint stops, natural pacing slowdowns, and a generous daylight buffer before dusk.
A successful hike leaves you with enough reserve energy to finish comfortably. It also builds the core judgment required as you venture onto more remote backcountry trails.
What Mistakes Make a Hike Dangerous Once Cellular Coverage Disappears?
The single most dangerous mistake is treating a smartphone as a complete navigation and emergency communication system. Offline digital maps can guide you without cell service, but a phone cannot transmit emergency calls without a network connection. In remote terrain, safety relies on self-sufficiency independent of cellular coverage, including backup navigation tools and a filed trip plan.
Published carrier coverage maps do not guarantee a signal on the trail. Deep river valleys, dense forest canopies, rock walls, and distance from transmission towers create dead zones. A regional coverage map should never be taken as a promise of connectivity.
Losing cellular service becomes hazardous when paired with compounding issues: a dead battery, cold-weather shutdown, water damage, a missed junction, or an unexpected delay. Without a backup plan, minor hiccups can trigger rushed, unsafe decisions.
Always carry two independent navigation tools, including a detailed topographic paper map. A magnetic compass is an essential companion to your map, provided you know how to orient it. Offline navigation apps are excellent primary tools, but their offline downloads must be verified at home.
Filing a detailed trip plan is vital in areas lacking dependable cellular reception. Your plan should detail the exact route, vehicle license plate, participant names, turnaround points, and expected return time.
The Canadian non-profit AdventureSmart highlights this approach through its AdventureSmart outdoor preparation framework, built around the Three Ts: trip planning, training, and taking the essentials.
Leave this plan with an emergency contact along with explicit instructions on when to notify authorities if you are overdue. This ensures search and rescue teams receive accurate location data even if you cannot call for help from the trail.
In isolated wilderness regions, a dedicated satellite communicator or personal locator beacon (PLB) provides a vital emergency signaling lifeline. These devices operate on specific satellite networks, require active service subscriptions, and have unique operational constraints that must be tested before your trip.
Finally, check whether your destination park mandates trail sign-ins or wilderness permits. Complete these registrations where required, but remember that trail registries are not monitored continuously in real time.
Even with thorough preparation, hikers must remain willing to alter their plans when real-time conditions compromise safety. That decision often begins before taking the first step.
When Should You Turn Back Despite Having a Planned Route?
You should turn back the moment environmental conditions exceed your group’s capabilities or threaten a safe return before dark. Trail washouts, incoming severe weather, broken critical gear, or unexpected exhaustion are all valid reasons to abort a hike. The decision must be based on present hazards, not on the time and effort spent planning the trip.
To avoid emotional decision-making under stress, establish three structured decision gates: before leaving home, upon arriving at the trailhead, and while walking the trail.
Before leaving home, check regional weather alerts, fire bans, and official trail closures to eliminate routes incompatible with current forecasts. Approaching thunderstorms, extreme heat advisories, early snowstorms, or reports of trail ice justify postponing the trip.
At the trailhead, real-world observations take over from forecasts. Flooded trailheads, rapidly darkening storm clouds, or a group member feeling unwell before starting should prompt an immediate reassessment.
On the trail, constantly monitor elapsed time, your group’s actual pace, physical stamina, and weather changes. If returning before nightfall becomes doubtful, pushing onward to reach a summit or viewpoint is no longer safe.
Canadian hiking seasons also demand close attention to wildfire smoke. High particulate levels degrade air quality and make heavy physical exertion hazardous, even when trails remain physically open.
The Government of Canada wildfire smoke guidance advises tracking the Air Quality Health Index (AQHI) and local health advisories, recommending that outdoor activities be rescheduled or canceled when health risks are elevated.
Hikers frequently fall into a psychological trap: pushing ahead simply because they drove several hours, paid for park passes, or spent days planning. This is the sunk cost fallacy. Past investments do not make the remaining trail any safer.
The solution is establishing unambiguous, pre-agreed turnaround boundaries before you hike: a strict turnaround time, clear weather triggers, and an honest limit on the technical difficulty your group can safely handle.
Turning around might mean heading home, taking a short, sheltered stroll in a safer area, or rescheduling for another weekend. Never improvise an unmapped shortcut or unverified alternate trail when weather or terrain turns dangerous.
Knowing when to turn back is a hallmark of an experienced hiker. It ensures you stay safe to hike another day, keeping outdoor adventure distinct from reckless risk-taking.
Adapting Your Approach: How to Progress Without Losing the Joy of Hiking
Progressing as a hiker does not mean you must always hike faster, push farther, or tackle increasingly extreme terrain. Sustainable growth centers on building outdoor competence, self-reliance, and a deeper appreciation of the natural environment. Challenging terrain should serve as a means to enrich your experience, not as the sole metric of success.
As groups gain experience, it is easy to fall into the trap of constantly escalating mileage or elevation. Yet a memorable outing is not defined solely by vertical gain or trail speed. Pausing to take in the landscape, observing local flora and fauna, and sharing trail decisions are equally rewarding skills.
When mentoring less experienced companions, explain your decision-making along the way. Why pick this line through a boulder field? Why check the time before starting this climb? Why put on an extra layer during a rest break?
These shared insights help less experienced hikers develop situational awareness organically. This real-time learning is far more engaging than a lecture at the trailhead, provided it remains supportive and responsive to the group’s needs.
Structure your hiking progression in gradual stages:
- Master well-marked frontcountry trails with moderate elevation changes.
- Explore uneven, rocky terrain without simultaneously increasing mileage and remoteness.
- Learn to navigate fluently with a topographic map and magnetic compass.
- Undertake longer day hikes with clear, realistic turnaround points.
- Advance toward remote backcountry routes or multi-day backpacking trips with proper wilderness training and gear.
Wilderness huts or multi-day backcountry trips introduce new logistics: booking backcountry permits, managing bear safety, purifying water, and packing emergency shelters.
Outdoor ethics are central to hiking progression. Practicing Leave No Trace principles, respecting trail closures, and maintaining safe distances from wildlife ensure natural spaces remain healthy and accessible.
Finally, remember that a group’s skill level is determined by its least experienced member. Tailoring the day’s pace and objectives to that person preserves the shared joy of the outing and prevents risky decisions driven by fatigue.
This deliberate approach also protects your mental energy. A grueling day on the trail tires more than just your legs—it can tax your decision-making through accumulated stress.
Why Does a Cascade of Small Stresses Lead to Mental Fatigue on the Trail?
A continuous series of minor stresses can exhaust a hiker mentally because it demands sustained vigilance. Double-checking trail blazes, monitoring darkening skies, picking through ankle-turning rocks, and managing group dynamics drain cognitive reserves. When physical fatigue sets in alongside mental strain, decision-making quality rapidly deteriorates.
A poorly marked trail is a classic culprit. At every split, the group pauses, second-guesses the route, checks screens, and debates which way to go. Even if no wrong turns occur, the constant micro-delays leave everyone mentally worn down.
Minor gear irritations take an identical toll. An ill-fitting pack strap, a hard-to-reach water bottle, or a hotspot on your heel create persistent friction. In isolation, each seems trivial; together, they erode patience and cloud your ability to assess trail hazards calmly.
The danger peaks when a group cuts corners to make up for lost time: skipping scheduled rest breaks, failing to check map checkpoints, or ignoring route doubts. These compromises do not guarantee an accident, but they eliminate your margin for error.
Structured trail routines mitigate this cognitive overload. Establishing clear checkpoints before leaving the trailhead distributes decisions evenly throughout the day:
- A quick stop within the first 20 minutes to confirm pack fit, adjust layers, and check pacing.
- A navigation check before tackling ambiguous or complex trail junctions.
- A firm, non-negotiable turnaround time established before setting out.
- Regularly scheduled breaks to hydrate, refuel, and check in on group morale.
Open communication is equally vital. A hiker who falls unusually quiet, slows down significantly, or struggles with simple decisions may be experiencing exhaustion, dehydration, or mild hypothermia. These subtle changes should never be ignored.
Learn to separate ordinary trail fatigue from genuine medical issues: sudden confusion, slurred speech, dizziness, or loss of motor coordination demand immediate attention and may warrant calling for emergency rescue.
Rather than relying on continuous high-alert vigilance, design your day to minimize unnecessary friction, leaving plenty of mental bandwidth for the unexpected.
Building this physical stamina and mental pacing can happen close to home, especially through everyday active transportation like walking and cycling.
Practical principles for steady outdoor progression
- Start with realistic outings: Consistency builds aerobic endurance far more safely than jumping straight into extreme hikes.
- Read real-world conditions: Incline, footing, traffic, and weather shape everyday commutes just as much as wilderness trails.
- Embrace seasonal adaptability: The most sustainable fitness habits adapt smoothly across seasons, schedules, and energy levels.
How to Replace Car Trips with Practical Active Transportation
Replacing car trips with active transportation starts by identifying short, recurring errands that can be comfortably completed on foot or by bike. Just like planning a hike, distance alone does not determine feasibility: hills, pedestrian infrastructure, weather, and time constraints all dictate success.
Begin by auditing your weekly routines. A quick trip to the local market, public library, or community center can often be done without driving. However, an errand that looks short on a map can become impractical if it forces you through dangerous highway intersections or poorly lit corridors.
The easiest way to start is picking a single recurring trip and testing it under pleasant weather conditions. This test run lets you measure travel time, route safety, and physical comfort accurately.
For walking, assess sidewalk continuity, crosswalk safety, and street lighting. For cycling, look for protected bike lanes, low-traffic residential streets, and secure bike parking at your destination.
In Canada, seasonal shifts dramatically affect active transit. A path that is pleasant in July may become an unplowed snowbank in January. Freezing temperatures, slush, ice, and reduced daylight demand appropriate clothing, studded tires, or switching to public transit during winter storms.
Adopting flexible seasonal routines is far more realistic than demanding year-round perfection. Walking more during spring and fall, cycling on protected routes in summer, and using transit on stormy winter days represents a balanced, sustainable progression.
These daily habits directly reinforce your hiking fitness. Regular walking builds baseline aerobic stamina, strengthens leg joints, and tunes your awareness of physical pacing on uphills and downhills.
However, treat urban walking as base conditioning rather than complete wilderness preparation. Pavement walking does not train the ankle stability or balance needed for scrambling over wet granite boulders or navigating backcountry trails.
Practicality also depends on where you live. In car-dependent suburbs with sprawling commercial centers, active transit can be challenging. Replacing a few trips where infrastructure exists is a more achievable goal than attempting to eliminate driving entirely.
To begin, pick one manageable local errand, map a safe pedestrian or cycling route, and test it on a clear day. This simple step builds daily health and functional stamina, laying the groundwork for more ambitious and rewarding backcountry adventures.
How much time should a beginner budget for a 5-km hike?
Parks Canada suggests planning for a baseline pace of 2 to 2.5 km/h on natural trails, which translates to roughly 2 to 2.5 hours of moving time for 5 km, excluding rest breaks and photo stops. On steep, rocky, or technical terrain, completion times can easily double. Always plan based on estimated trail completion times and preserve a daylight buffer.
Is it safe to hike alone on easy Canadian trails?
Solo hiking is common, but it reduces your immediate margin of safety if you twist an ankle or encounter wildlife. For your first few hikes, going with an experienced partner is recommended. If hiking alone, always leave a written trip plan with a reliable contact, carry the essential safety gear, and stick to well-traveled trails.
Is a smartphone GPS app enough to navigate without cellular service?
No. While offline GPS mapping apps work without a cellular connection, smartphones are vulnerable to dead batteries, cold-weather shutdowns, and water damage. A detailed topographic paper map and magnetic compass are essential backups. Furthermore, a phone cannot transmit an emergency call without a cellular signal.
How can you check if a trail is open and safe before heading out?
Check the official park website or trail association portal for active closures, trail condition reports, and wildlife warnings. Cross-reference these with local meteorological forecasts. Remember that an absence of posted closures does not guarantee that every section of trail is dry, clear of blowdowns, or hazard-free.
What is the best time of year for beginner hikers in Canada?
There is no single ideal season across Canada, as climates vary dramatically by province and elevation. Generally, mid-summer through early autumn offers snow-free trails, stable weather, and long daylight hours. Always confirm that your destination trail is free of lingering spring snow or ice, check local wildfire smoke forecasts, and ensure adequate daylight to return safely.