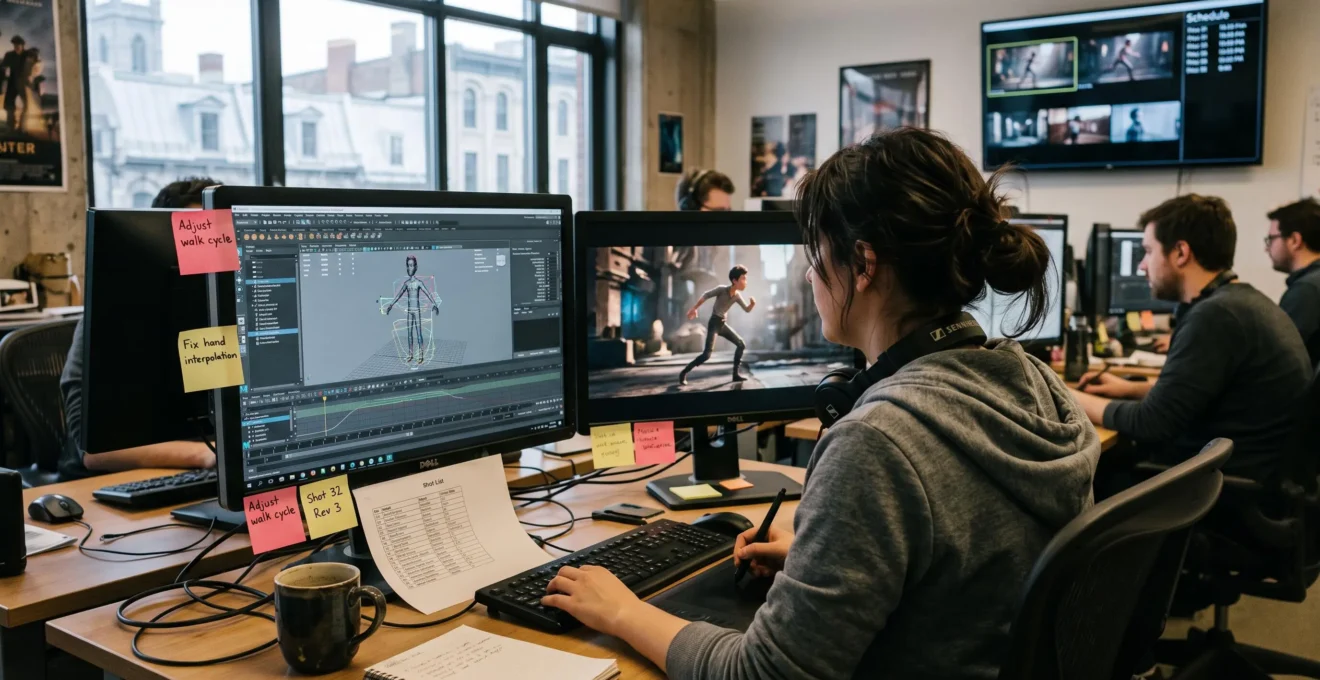
Convincing 3D animation does not depend solely on high-resolution modeling or powerful hardware. It is the result of technical and artistic decisions executed in the proper sequence. Flawed edge flow can complicate character rigging, poorly planned lighting setups can bring render queues to a crawl, and delayed creative sign-offs can force teams to rebuild entire shots.
To avoid these production bottlenecks, workflows must be structured around a clearly defined 3D pipeline: pre-production, 3D modeling, rigging, character animation, visual effects and physics simulations, lighting, rendering, and final compositing. Each phase must produce verified, production-ready assets before passing files to the next department.
This production discipline applies equally to independent solo artists and boutique production studios across Quebec and Canada. It enables technical directors to determine which skills to mobilize, which rendering architectures to adopt, and where to focus creative energy to achieve visual fidelity without inflating compute costs and production hours.
Core principles of an efficient 3D animation pipeline
- Break down projects into discrete shots and auditable milestones to map dependencies and estimate actual labor requirements.
- Build models specifically for intended motion and select render engines based on visual fidelity targets, available hardware, and delivery deadlines.
- Profile scene performance, maximize modular asset reuse, and centralize sign-offs to eliminate expensive rework.
- Why Can a Few Seconds of 3D Animation Require Days of Production?
- How to Prepare a 3D Model to Prevent Deformations and Rigging Failures
- Real-Time vs. Offline Rendering: Which Fits Your Animation Project?
- Which Common Modeling Mistake Causes Render Times to Explode?
- How to Achieve Visual Realism in 3D Scenes Without Increasing Polycounts
- Which Agile Missteps Accumulate Technical Debt Despite Frequent Deployments?
- How to Track a Complex 3D Project Without Making Reporting a Full-Time Job
- How Video Games Evolved into Both Mainstream Entertainment and a Strategic Industry
Why Can a Few Seconds of 3D Animation Require Days of Production?
A few seconds of finished 3D animation can demand days of full-time production because on-screen runtime represents only the final output of an extensive technical chain. Every individual shot requires asset creation, technical rigging, character performance, lighting setups, and final frame rendering. Asset complexity, dynamic hair or cloth simulations, and iterative client reviews dictate production timelines far more than raw screen duration.
A ten-second shot often requires building detailed digital sets, skinning an articulated character rig, choreographing primary and secondary motion curves, and balancing lighting setups. These foundational engineering steps are essential to the final frame, but remain invisible to the audience.
A standard animation pipeline consists of tightly coupled, sequential stages:
- Pre-production: Establishing visual art direction, narrative pacing, storyboards, and camera blocking (animatics).
- Asset Creation & Rigging: Modeling polygonal meshes, unwrapping UVs, texturing, and building skeletal deformation controls.
- Animation & Simulation: Posing characters, refining animation curves, and baking dynamic cloth, fluid, or hair simulations.
- Lighting & Rendering: Setting up digital lights, tuning physical shaders, and calculating multi-pass render layers.
- Compositing & Delivery: Merging render passes, color grading, adding optical lens effects, and exporting final master sequences.
Production scheduling must also separate artist labor hours from compute rendering time. Artist time covers modeling, creative animation, lighting tweaks, and revision notes. Compute time encompasses simulation caching, geometry preparation, and frame rendering. While workstations can compute overnight, technical dependencies limit how much creative work can proceed in parallel.
In a purely illustrative scenario, a 10-second cinematic rendered at 24 frames per second consists of 240 individual frames. If each frame requires two minutes of compute time on a local workstation, the sequence demands eight continuous hours of machine rendering—excluding test renders, technical crashes, and creative notes. Using a distributed render farm spreads the compute load across multiple nodes, but does not eliminate setup and transfer overhead.
To build an accurate production schedule, break the project down shot by shot, assigning hours to each pipeline stage. Categorize shots by character count, environmental interaction, dynamic simulations, lighting complexity, and render overhead. Budget separate review cycles and technical buffers for unexpected pipeline errors.
Granular planning prevents a late-stage camera focal length change from invalidating completed character animation, lighting caches, and compositing passes.
This forecasting holds up only if assets moving down the pipeline meet strict technical standards. Preparing 3D models properly serves as the first critical quality control gate.
How to Prepare a 3D Model to Prevent Deformations and Rigging Failures
A 3D model intended for animation must be constructed around its anticipated range of motion. Mesh topology, edge flow loops, pivot placements, and transform hierarchies must support clean, predictable deformation. Testing extreme character poses, auditing surface normal orientation, and freezing transformations catch defects before assets are handed over to animators.
A static model built for an architectural still image only needs to look convincing from a single camera angle, without requiring clean underlying edge flow. An animated character, by contrast, must maintain volume without collapsing when elbows flex, shoulders rotate, or facial expressions shift.
The placement of edge loops across bending joints is paramount. Quad-dominant geometry provides predictable subdivision and clean deformation across organic musculature, though triangles remain acceptable on rigid non-deforming surfaces. The priority is ensuring topology matches functional movement.
Official documentation from Autodesk on preparing a 3D model emphasizes that edge loop distribution must anticipate how a mesh will bend and twist in final animation.
Rigging acts as the technical bridge between modeling and animation. Before modeling begins, determine whether movement requires a joint skeleton, specialized inverse kinematics (IK), custom corrective blend shapes, or dynamic secondary physics. Restructuring mesh topology after skinning weights are painted forces technical artists to repaint vertex weights and rebuild deformation networks.
For hard-surface mechanical models, priorities shift. Articulated components must be separated into clean sub-meshes, pivot points must snap to functional rotational axes, and parenting hierarchies must replicate mechanical assemblies. A vehicle, for example, must be able to steer and rotate its wheels without causing body panels to shear.
Clean scenes require standardized technical hygiene: strict file-naming conventions, uniform scene scale units (centimeters or meters), frozen transforms, and clean grouping. These practices ensure reliable asset referencing across software packages and production versions.
Pre-rigging model validation checklist
- Stress-test joint articulation in extreme poses, capturing screen grabs of mesh intersections.
- Audit edge flow loops across deforming joints, retopologizing pinching areas directly in the source file.
- Check surface normal orientation, weld overlapping vertices, and run non-manifold geometry cleanup scripts.
- Snap pivot points to mechanical axes, freeze transformations to zero, and delete construction history.
- Standardize asset naming, verify UV texture mapping sets, and export clean reference geometry for rigging.
A well-prepared asset prevents pipeline crashes during animation. The next technical fork is choosing between real-time game engines and offline ray tracers, which dictates shader setups and geometry budgets from day one.
Real-Time vs. Offline Rendering: Which Fits Your Animation Project?
Real-time rendering fits projects requiring rapid creative iteration, interactive control, or tight turnaround deadlines where performance budgets are prioritized. Offline ray tracing remains the choice when delivering photorealistic visual effects where complex light transport and sub-surface scattering justify multi-hour frame calculations. The choice depends on target visual fidelity, hardware infrastructure, delivery deadlines, and optimization overhead.
In a real-time game engine, frames are calculated in milliseconds (typically 30 to 60 frames per second) to support live playback. In an offline ray tracer, a single frame can compute for minutes or hours to simulate physically accurate global illumination, path tracing, and complex volumetrics.
This operational distinction is detailed in documentation from Unreal Engine on the rendering pipeline. Modern game engines can also render final cinematics using offline movie render queues, meaning real-time software is no longer restricted to low-fidelity interactive viewports.
Production teams should evaluate core technical trade-offs before locking in a pipeline:
| Evaluation Criteria | Real-Time Engine Pipeline | Offline Ray-Tracing Pipeline |
|---|---|---|
| Primary Objective | Interactive frame rates and instantaneous visual playback. | Maximum visual realism, complex shaders, and lighting fidelity. |
| Creative Iteration | Instantaneous feedback on camera, lighting, and layout. | Relies on viewport previews; final frames require render queues. |
| Lighting Architecture | Screen-space techniques, Lumen, and hardware ray tracing. | Unbiased path tracing, deep light bounces, and complex caustics. |
| Optimization Overhead | High upfront engineering: LODs, texture packing, draw call caps. | Focuses on render sample tuning and RAM memory management. |
| Optimal Use Cases | Virtual production, real-time cinematics, episodic series. | High-end feature VFX, complex refraction, and architectural stills. |
A common pitfall is assuming that adopting a real-time engine automatically accelerates overall production. While final rendering is fast, authoring real-time assets requires significant technical overhead: creating Levels of Detail (LODs), optimizing vertex counts, baking lightmaps, and profiling shaders. On a short commercial with a tight deadline, this technical overhead may outweigh offline render queue times.
A hybrid pipeline offers a viable middle ground: layout artists and animators block out camera shots and character performances in real-time viewports, while final production frames are rendered offline using Arnold, V-Ray, or Redshift. This workflow requires planning early to ensure cross-engine shader and geometry compatibility.
In Canada, drawing on talent from established visual effects and game development clusters across Montreal and Vancouver makes both workflows viable. The chosen path should match the specific technical strengths of your production team.
The smartest decision benchmark uses real-world scene tests: profiling a representative shot complete with final character rigs, production shaders, dynamic lights, and target frame resolution.
Once your rendering engine is locked down, scene performance depends heavily on modeling discipline. Modeling errors can cripple viewport frame rates and inflate render times long before final frames are sent to the farm.
Which Common Modeling Mistake Causes Render Times to Explode?
Excessive geometric density is a common modeling error that drives up render times, especially when subdivision surface modifiers are applied indiscriminately across non-deforming background meshes. However, polygon density is rarely the sole culprit: unoptimized shader networks, overlapping transparency channels, excessive texture memory, and volumetric light sampling must all be audited before attempting geometry decimation.
Bottlenecks frequently occur when modelers build micro-details that are completely invisible from the final camera perspective. Modeling individual screw threads, internal geometry, or sub-millimeter bevels on assets framed in wide master shots balloons polygon counts without adding a single perceptible pixel of quality.
Subdivision surface modifiers must be calibrated against on-screen silhouette resolution and joint deformation needs. A subdivision level necessary for an extreme facial close-up is entirely wasteful on an asset placed fifty feet from the camera lens.
Asset duplication requires equal scrutiny. Rather than copying unique geometry across a scene, use hardware geometry instancing. Instanced assets share identical mesh data in GPU memory, dramatically lowering memory footprints and draw call counts.
Hidden geometry, unlinked construction nodes, and unpurged temporary modeling cameras clutter scene files. While modern rendering engines cull occluded geometry automatically, unoptimized objects still consume memory during scene parsing. Profile memory usage before arbitrarily deleting assets.
The most dependable diagnosis relies on profiling a representative test frame. In Unreal Engine, GPU profiling tools isolate whether bottlenecks stem from shader complexity, draw calls, or high polycounts.
Unreal Engine documentation on optimizing real-time rendering stresses benchmarking performance directly on target hardware, identifying specific architectural bottlenecks before modifying scene assets.
In offline engines like Arnold or Blender Cycles, consult detailed render diagnostic logs. If scene parse times dominate, geometry and textures are overloading RAM; if pixel sampling takes hours, shader complexity or volumetric noise is the culprit.
Lock in a benchmark frame and render time, adjust one variable at a time, and re-benchmark. This diagnostic discipline prevents teams from degrading visual fidelity across an entire scene when an unoptimized material or misconfigured light was the sole cause of the bottleneck.
The goal is not building the lowest-poly scene imaginable, but building an optimized scene that allocates compute power where it matters most. This same economy of detail applies to achieving visual realism.
How to Achieve Visual Realism in 3D Scenes Without Increasing Polycounts
Visual credibility in 3D animation relies on coherent lighting, physically accurate material response, and realistic surface imperfections. Dense polygon counts are only one way to communicate detail. High-resolution texture maps, normal maps, roughness variations, and cinematic camera framing can deliver compelling realism without inflating geometric complexity.
Audiences evaluate material properties through how light interacts with surfaces. A polished metal is defined by its Fresnel reflectance, micro-roughness, and environmental reflections, not just its base color. Similarly, a weathered wooden tabletop looks synthetic if rendered with uniform glossiness, but believable when varied with subtle scratches and roughness maps.
Before adding geometric polygons, separate visual detail into three production tiers:
- Physical Geometry: Essential when a feature breaks the outer silhouette of the model, casts cast shadows, or undergoes mechanical deformation.
- Shaders & Texture Maps: Ideal for high-frequency micro-details, surface weathering, color variance, and normal displacement that do not alter physical silhouettes.
- Compositing Passes: Used to integrate multi-pass layers, calibrate atmospheric depth, apply subtle chromatic aberration, and balance contrast in 2D post-production.
Level of detail must be dictated by the shot’s focal length and camera placement. An asset positioned in the background does not require the geometric density or 4K texture sets of a hero prop held by the lead character. Distant signage should use a flat texture map, while foreground machinery demands modeled bevels and silhouette edges.
Narrative detail placement saves modeling and rendering time. Rather than detailing an entire digital set uniformly, focus visual complexity where the camera and viewer will look: along character action paths, near light sources, and around high-contrast focal points.
Studying physical photographic reference prevents procedural artificiality. Observe how dust settles into crevices, where edges wear down, and which surfaces collect fingerprints. Random, uniform wear patterns look just as artificial as sterile, spotless CGI.
Case study: enhancing an interior office environment
In a 3D office interior, furniture assets look sterile and CG. Rather than increasing polygon counts, the lighting artist adjusts the physical radius of the key light to soften shadows, adds a subtle roughness map breaking up reflections on the desktop, and layers wear along frequently handled drawer handles.
These material adjustments ground the scene in physical reality without adding geometry. The scene is reviewed through the final animated camera frustum to ensure detail is visible on screen without wasting compute time on out-of-frame assets.
A compelling scene relies on a disciplined hierarchy of detail. Useful realism is what the camera lens actually registers.
This approach also supports asset reuse across multiple projects, provided teams maintain clean file conventions and avoid rebuilding the same assets from scratch.
Which Agile Missteps Accumulate Technical Debt Despite Frequent Deployments?
Frequent sprint deliveries increase technical debt when production teams systematically prioritize temporary visual shortcuts over asset hygiene. Temporary character rigs, uncleaned scene files, hardcoded absolute filepaths, and undocumented shaders allow teams to hit early milestone demos, but introduce compounding friction that complicates down-pipeline production.
In a 3D production pipeline, technical debt represents the rework generated by tactical shortcuts that accelerate immediate delivery while making future iterations harder. It hides in messy directory structures, unstandardized naming conventions, and brittle rig constraints.
Agile frameworks are not inherently responsible for this degradation. Debt compounds when sprint reviews evaluate progress exclusively on the volume of rendered frames shown, without auditing the underlying health and reusability of production files.
A character rig may perform well for a simple walk cycle in a sprint demo. However, if its joint controls are counter-intuitive, its axes uncalibrated, or its naming inconsistent with other studio rigs, animating it in complex action scenes will prove expensive.
Three operational anti-patterns regularly derail 3D teams:
- Maintaining conflicting versions of master assets without designating a definitive source of truth.
- Perpetually postponing scene cleanups, naming audits, and compatibility testing to hit short-term sprint deadlines.
- Treating an approval on an untextured playblast demo as complete technical sign-off on the underlying rig.
To mitigate this exposure, bake technical health criteria into your Definition of Done. An asset is complete only when its naming conventions, dependency paths, material assignments, and documentation pass pipeline validation checks.
Schedule dedicated maintenance sprints: optimizing generic background rigs, cleaning shared material libraries, organizing asset repositories, and purging obsolete external references. The necessary time investment scales with project scope.
An actionable operational metric is the turnkey asset reuse rate: the percentage of library assets imported into new shots without requiring manual topology or shader fixes.
This metric does not measure artistic quality—some hero assets are intentionally bespoke. However, it exposes asset libraries that appear extensive on shared drives but require hours of cleanup before they can be used in production.
Teams can maintain regular sprint velocity without sacrificing pipeline stability. For this discipline to last, project tracking must remain lightweight and directly tied to daily artist workflows.
How to Track a Complex 3D Project Without Making Reporting a Full-Time Job
Tracking a complex 3D animation project requires centralizing shot statuses, approval gates, and critical bottlenecks in a shared tracking tool. Project management should draw directly from production pipeline metadata where possible. It must enable fast decision-making without burdening artists with duplicate manual status reporting.
The primary goal of production tracking is exposing dependencies that threaten milestone delivery. A high-level percentage-complete progress bar rarely reveals whether complex hero shots will clear the render farm on schedule.
Knowing exactly which shots are bottlenecked waiting on animation approval, which are ready for lighting, and which are failing on the render farm enables immediate intervention.
The most effective tracking unit sits at the intersection of the shot and the pipeline stage. This granularity provides visibility into bottlenecks without micromanaging individual hourly tasks.
A production dashboard should capture these operational fields:
| Data Field | Operational Function |
|---|---|
| Shot Identifier | Links scene files, review notes, and compositing layers. |
| Active Pipeline Stage | Identifies real-world department ownership (Layout, Anim, Light, Comp). |
| Assigned Artist | Clarifies technical ownership and task routing. |
| Approval Status | Surfaces assets blocked waiting on creative sign-off. |
| Forecasted Target Date | Highlights schedule variance against master milestones. |
| Active Blocker Description | Prioritizes technical or artistic intervention by leads. |
Modern production management platforms can automate tracking from existing pipeline actions: saving incremental versions, submitting render jobs, and publishing review clips. Qualitative creative feedback still requires human logging from directors and supervisors.
Two metrics demand ongoing monitoring: the percentage of shots blocked in review (which reveals executive approval bottlenecks) and variance between estimated and actual artist hours per shot (which flags under-scoped technical complexity).
These indicators are operational early-warning signals, not personal performance metrics. A hero shot with complex crowd simulation will naturally require more review cycles than a simple dialogue cutoff without signaling pipeline failure.
Finally, keep status reviews short and focused on unblocking work. Stand-ups should yield clear outcomes: signing off on an asset, approving a technical workaround, or reassigning dependencies.
This tracking framework brings production discipline to boutique teams. It is especially valuable in an industry where pipelines, talent, and tools flow fluidly across animation, visual effects, and video game development.
Key takeaways before formalizing your pipeline
- Prioritize modular, reusable assets and standardized file conventions over quick, unmaintainable shortcuts.
- Scale your pipeline to your team: an independent studio can apply the same rigorous stage-gate approvals as an enterprise facility using lean software tools.
- Cultivate technical literacy spanning linear animation and real-time game engines, while respecting their distinct rendering constraints.
How Video Games Evolved into Both Mainstream Entertainment and a Strategic Industry
The video game industry has become a strategic creative sector by combining mass cultural reach, technical software innovation, and complex digital production pipelines. In Canada, its growth has established world-class hubs in software engineering, 3D character animation, and visual effects. Production methodologies forged in game engines now directly reshape linear animation and virtual filmmaking.
Game development has driven the evolution of software architectures capable of rendering complex environments, high-fidelity digital humans, physical shaders, and real-time camera movements. These technologies operate under strict constraints: delivering visual fidelity while maintaining interactive frame rates.
Linear animation studios leverage these real-time tools for virtual set layout, story animatics, and lighting look-development. Conversely, cinematic video games rely heavily on disciplines rooted in traditional filmmaking: cinematography, performance direction, screenwriting, and lighting design.
In Canada, this industry represents a major economic driver whose expansion has been tracked by national statistical agencies.
775 to 1,628 enterprises
The growth in the number of active video game businesses documented across Canadian provinces between 2013 and 2022. These figures reflect the formal statistical definition of the video game sector, rather than all commercial 3D animation facilities, and do not represent a 2026 census.
Statistics Canada article on the video game industry in Canadian provinces, released August 27, 2025.
This study also noted that in 2022, Quebec supported 338 active businesses in the video game sector, compared to 638 in Ontario. Based on administrative tax and payroll data, these metrics capture a defined historical period. They do not quantify all employment across linear 3D animation studios or universal real-time engine adoption.
For a 3D artist, the convergence of games and animation underscores the value of cross-disciplinary literacy. While modeling, rigging, and animation fundamentals remain paramount, understanding real-time shaders, draw calls, and pipeline scripting makes artists far more valuable to technical directors.
Cross-disciplinary fluency does not mean every artist must master every tool. In large studios, responsibilities remain specialized: character modelers, riggers, animators, lighting artists, pipeline technical directors, and tools programmers work within distinct lanes.
For independent creators producing their own content, the takeaway is methodological: choose a stable, integrated software suite, master its performance constraints, and build a modular asset library, rather than juggling multiple applications without an overarching pipeline strategy.
Industry best practices offer a helpful blueprint, but they must be adapted to your project’s scale. An enterprise pipeline designed for a 200-person studio will introduce unnecessary administrative drag to a small independent team producing a short sequence.
The next step is picking a short, representative sequence, establishing clear milestone deliverables, and executing it end to end. This pilot run will expose your pipeline’s real-world bottlenecks, allowing you to refine your workflow before scaling production.
Do you need to master every 3D software tool to produce an animated short?
No. You can produce an entire project within a single software suite that covers modeling, rigging, animation, shading, and rendering. Secondary software tools become necessary only when a project demands specialized cloth simulations, complex crowd systems, or advanced compositing. The priority is mastering asset handoffs across core pipeline stages.
At what point should camera animation be locked?
Camera motion should be locked during the 3D animatic and layout phase, well before artists begin character animation and final lighting. Framing dictates what geometry is visible, asset level of detail, and performance staging. Late camera adjustments force expensive rework across animation curves, lighting passes, and compositing layers.
How do you know when a 3D scene is sufficiently optimized?
A scene is optimized when it meets project visual fidelity, frame rate, and memory allocation targets on intended production hardware. Profile performance using diagnostic render logs and engine profilers to identify bottlenecks. Chasing the lowest possible polygon count is bad engineering if geometry decimation degrades visual silhouettes.
How should a boutique 3D team manage file version control?
Standardize folder structures and file-naming conventions capturing project, asset name, pipeline department, and version number. Keep working files separate from published master assets referenced by other departments. Automated cloud backups, clear write permissions, and defined approval gates prevent artists from overwriting master production files.
What is the best starter project to learn 3D pipeline discipline?
Animate a single character interacting with one prop inside a small set, captured across two distinct camera angles with studio lighting. This bounded scope exercises the entire pipeline—from asset modeling and rigging through to animation, lighting, and compositing—without overwhelming the creator with asset production volume.